
BCOOL Indoor Bicycle Trainer SIMULATOR Hi Tech http://www.rbinc-sports.com 79 Wingold ave Unit 10. Reasonably priced the most awesome trainer that is a Video simulator- works on I Pads or Computers this is cutting edge technology- Ride against the computer or your friends on courses around the world or make up your own coarse! Check it out on Youtube- Its from Spain so nothing hi tech up yet. https://www.youtube.com/watch?v=W-xreBhK3Tw You tube it to get a better idea of what its about. You don’t need a 3D TV – just a computer or I pad or even an I phone!
Extreme realism


Experience the most realistic sensations. Professionals agree: with Bkool actual riding sensations on the ground can really be felt.
Pro Trainer
COLOR Black
STABILITY Extra
NOISE EMISSION (at 4000 rpm) Low (64dBA)
(a conversation ranges from 40-70dBA)
WEIGHT Very light.
10.9 kg.
SIZE Detalles
Compact. 580 x 610 x 412 mm.
800 x 610 x 412 mm (arms extended)
Bkool Indoor
Indoor riding simulator
For the most realistic riding experience. Enjoy hundreds of real videos and over 500,000 riding sessions. Ride with up to 100 friends from all over the world. Create, share and take part in leagues, groups and rankings.
Bkool Outdoor
Cycling and running app
Easily record your rides and runs on your mobile. Track your training in real time or analyze the data afterwards. Store your training data at Bkool.com and analyze it, share it or relive it at home.
Features
Track GPS. Record your route using your phone’s GPS.
On-screen display. See distance, duration, speed, heart rate and power information.
Maps. See your activity as you record it or a history of past sessions.
Altimeter. See the altitude profile for the activity.
Auto-pause.Recording stops automatically when you stop moving.
Audio. Voice feedback while you train.
Requirements
Android 2.1 and later.
iOS 3.0 and later. Compatible with iPhone, iPad and iPod touch.
Bkool video editor
Video route editor for cycling
Create your own video profiles easily with our editor. Use a camera with GPS or combine it with your usual GPS device. Display the route on the map. Edit all or part of the route and correct mistakes in the profile. Upload it to Bkool where you can repeat it and share it.
Features
Import directly from your camera to the editor. Compatible with Garmin Virb/Contour/GoPro.
Route editing. Do it all or just the parts you want.
Synchronize. Match up the video with the GPS track.
Profile adjustments. Correct any errors in the GPS.
Points. Label the sprints, mountain passes and points of interest.
Map routes. If you don’t have a GPS track, trace it out yourself.
Requirements
Operating system: Windows XP / XP64 / Vista / Vista 64 / 7 / 8 (with latest service packs installed). Mac OS X v10.6 / v10.7 / v10.8 / v10.9.
Processor: Intel Pentium 4 2.4 GHz or AMD Athlon XP 1500+ or better.
Memory: 1 GB RAM.
Hard drive space: 500 MB.
Internet connection (map view, update altitude, upload edited video).
Bkool Indoor
Indoor riding simulator
For the most realistic riding experience. Enjoy hundreds of real videos and over 500,000 riding sessions. Ride with up to 100 friends from all over the world. Create, share and take part in leagues, groups and rankings.
Cycling trainer + Simulator in one
Try it for free and pay only if you keep it.
Get the most realistic experience without leaving your home.
The best equipment in cycling.
Plug & Play
Connect it and pedal. It’s that easy!
Powerful: 1,200 W
Ramps up to 1,200w, on a progressive curve. You’ll feel just like you were out there on the road.
Compact & Light
Easy storage. We’ve reduced its weight and size to a minimum.
Smart behavior
Advanced electronics. The result of combining biomechanical engineering with the most powerful cycling software.
Silent
Bkool is one of the quietest trainers, which is very important if you’re going to train at home.
Great looks
Crafted design. Aesthetics matter
3D World. First time in the world!
Cover any route on the planet, alone or with up to 100 friends. Exclusive Bkool technology.
REVIEWS:
Bored in the basement during your seemingly endless trainer session? What if you could race Gloucester on your screen, actually seeing the course via your own GPS data and GoPro video? Or what if you could send a friend to the Nationals course in Austin and have him collect the GPS and video data so even in early December when there’s a foot of snow outside, you can be prepping for the Nationals course?
Spain-based Bkool can do that. At the 2014 Summer Press Camp, the company announced the launch this September of an “innovative training tool” for cycling indoors that combines a trainer and a simulator. Unlike other products on the market, both components have been developed as one integrated unit.
We tested the Bkool trainer briefly at Press Camp, and was impressed with the smooth and powerful resistance changes as the (virtual) ride terrain changed. With the exception of your bike’s angle changing with climbs and descents, and your bike swinging when out of the saddle, the simulation really provides a realistic training simulation, and on steep “climbs,” we could even feel overgeared due to the high level of resistance.
The technology is similar to the Wahoo trainer that we recently previewed, and the two technologies are compatible, meaning you can use the Wahoo trainer with the Bkool community.
It’s almost scary, but the trainer is described as being a “smart trainer.” The firmware in its electronics carries out complex calculations to convey the feel of the terrain to the wheel, letting the user sense changes in the gradient and texture of the terrain.
Before you worry that it’s heavy or bulky, don’t panic: The new version of the Bkool trainer is extremely compact and light, and yet extremely stable. And for the non-tech-savvy, it uses plug-n-play technology that is easy to install.
The cool part: a user can create his own routes or select from among the 500,000+ routes in the Bkool database. These routes can be shown in 2-D, video or map, and the user can see the route taken and parameters like distance, time, power, speed and gradient are displayed at all times.
You can also race your friends—or your nemesis. The simulator lets the user train with up to 100 friends simultaneously, wherever they may be around the world. According to Bkool, “Users can create a group and invite friends to join, or they can join an existing group, and ride a route anywhere in the world either at the same time or separately. They can also create sports events and take part in existing events, like leagues and competitions. Standings and rankings are generated dynamically.”
You can also get a bit “Tron-esque.” “Advanced users can compete against one another or create virtual riders (robots) with highly detailed profiles and thus improve their performance.
The cost of this crazy-sounding trainer of the future in the States is $649.99—very competitive to other simulator options like Computrainer. BKool admits that the price is kept low in hopes that members will join and become premium members, though free options are available without head-to-head racing or the ability to race community-submitted courses.
Their membership is similar to Strava’s setup—a free version, and a premium option that offers a lot of perks, like being able to use real video, or even race your friends (or random riders) when you need more motivation to pedal harder on a rainy day. The premium membership runs from $12-15 per month, depending on if you go for the annual membership or month to month. We’d probably opt for the monthly option so when the weather got nicer in the summer, we wouldn’t be tempted to stay inside in the AC instead of hitting the road on an ultra-hot day.
Even cooler? You ride your favorite route, and then upload your GoPro (or other camera) video and GPS .gpx file for an even more realistic trainer ride—great for practicing a ’cross course over and over again, even if you’re in Delaware and the race is six months away in Oregon!
Of course, the Bkool trainer gives you an excuse to buy a new GoPro as well—you know, for your training.
If you can only afford one trainer, you can also bring the trainer as a warm-up device for a cyclocross race, without the laptop or tablet-connected electronics. The only catch is that the resistance won’t be adjustable, and will default to the equivalent of riding flat ground.
Even though we’re not huge fans of spending countless hours riding a bike indoors when we can play in the mud or snow, we looking forward to testing a Bkool unit, as it looks like the company developed some interesting functionality, record keeping and community aspects to at least make trainer sessions more interesting and stoke our competitive fires. There’s even the Bkool equivalent of Strava KOM and QOMs for rides.
The BKOOL trainer is unique in the market in a number of ways. It marks the first trainer I’ve reviewed that includes an all-you-can-eat flat-rate approach to riding videos shot outdoors, while indoors. It’s also the first resistance controlled computerized trainer at 500€. And, because of that fancy little symbol (Euro) you see there – it’s also the first unit I’ve reviewed that only available today in Europe (Update: Now available worldwide).
But, they’re working to change that – so let’s dive into the unit a bit and see how it enters into the larger trainer market.
Back in October the folks at BKOOL sent me out a unit to try out. Ultimately, the unit will go back – like everything else I test. All products are returned to the companies (really, I simply don’t have room for this many trainers even if I wanted them).
Speaking of which, like all my reviews, they tend to be pretty in depth (perhaps overly so) – but that’s just my trademark DC Rainmaker way of doing things. Think of them more like reference guides than quick and easy summaries. I try and cover every conceivable thing you might do with the device and then poke at it a bit more. My goal is to leave no stone unturned – both the good and the bad.
Lastly, at the end of the day keep in mind I’m just like any other regular athlete out there. I write these reviews because I’m inherently a curious person with a technology background, and thus I try and be as complete as I can. But, if I’ve missed something or if you spot something that doesn’t quite jive – just let me know and I’ll be happy to get it all sorted out. Also, because the technology world constantly changes, I try and go back and update these reviews as new features and functionality are added – or if bugs are fixed.
So – with that intro, let’s get into things.
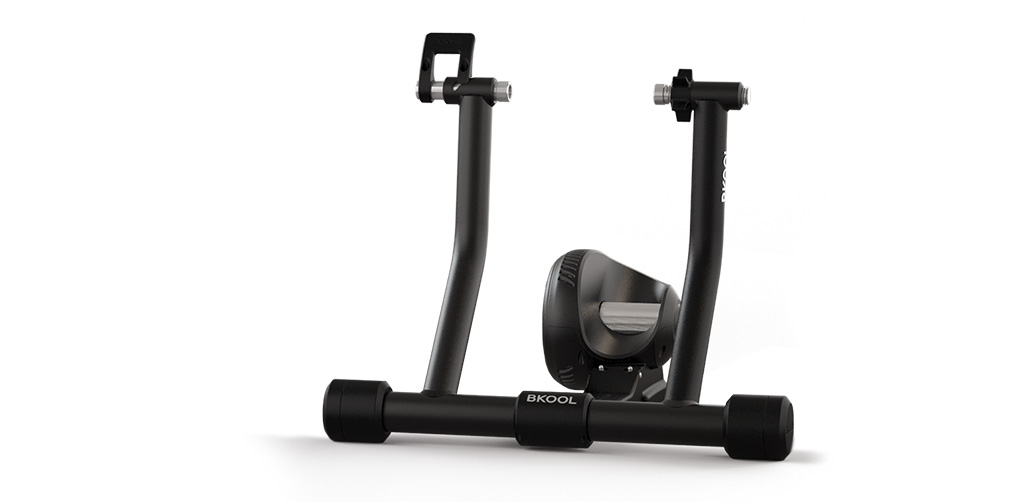
In addition to the trainer stand, you’ve also got a front wheel stand. Nothing special, but it does the trick and keeps your front bike wheel pointed forward.
Ok, with everything all unboxed, let’s get onto the setup piece.
HARDWARE SETUP:
The first thing you should do is to put some sort of trainer mat down. This is beneficial not only to protect your floor (unless you’re in a garage), but also because it typically reduces the sound of the trainer and vibrations. Once that’s done, plunk the trainer down on top of it:
You’ll notice on the back there’s a spot to plugin that power adapter they gave you. Now would be a good time to do so:
We’ll tackle that USB port you see there a bit later.
You’ll notice the trainer itself doesn’t actually have any support beams for the clamp system. If there’s not a bike there – it’ll just rest on itself:
See how if I then start to pickup the clamping portion, it rotates forward:
Now, I’ll continue rotating it forward until it aligns with my rear bike wheel (I’m assuming you’ve put that trainer skewer on there already).
Go ahead and clamp it in. The left system will lock it all in place in a split second. Probably one of the easiest trainer clamps to date I’ve seen in this area. Note that the clamp may feel a bit tight when you try and lock it. Just keep pushing, it won’t break. Well, hopefully anyway.
Once you’ve got it clamped in place, the rear wheel will simply rest against the roller. No downward pressure here or tightening the roller. Your body weight will do that.
What you do what to do however is ensure your tire is inflated properly. For most tires, that’s usually about 120psi. In my case, for these particular tires that was all the way up to 160psi.
Now lots of folks ask about dedicated trainer wheels. Trainer wheels are sorta a ‘religious’ topic. Some love them, others don’t bother. I fall into the ‘don’t bother’ category. In most cases you’re likely going to replace your tire (the rubber part) about once a year or so anyway from a tread perspective. At least if you’re putting on a fair number of miles. For me, the cost of tires are generally pretty cheap ($20-$40) – compared to the hassle of swapping out wheelsets or tires onto wheels each time I ride on a trainer (2-4 times a week). Again, to each their own.
I will point out however that I was surprised with how much tread comes off on this unit. Now perhaps because the unit is stark white – whereas every other trainer is dark, and no other trainer has a natural ‘catch’ for the material. But I thought it made for an interesting photo.
ONLINE SETUP:
The primary interface to the BKOOL as far as preparing workouts goes is actually online. In fact, the platform is fully integrated into an online account where your profile information, planned rides, and ride history is stored. It’s through that interface that you’ll add and create sessions that you’ll ride later on the trainer and desktop software. Think of the online site as a shopping cart for trainer sessions.
Within your online profile you’ll also configure display options as well – such as metric vs. statue, time zones and languages.
There’s really a ton of options here, more so than most online trainer integrated platforms that I’ve seen.
Of course, probably the biggest decision you’ll be making is just which subscription level you want to buy into. Unlike most trainer platforms, BKOOL doesn’t charge upfront for the trainer software, or videos or courses. Instead they have a Netflix model where you may monthly for unlimited access.
Essentially, the core functionality difference between Silver and Gold is the ability to use Real Videos. And quite frankly, that’s more than worth the 5€ euros a month (about $6-7US). Keep in mind that most trainer platforms charge about $100US per video. This is unlimited videos (to the extend their library has anyway).
With that, let’s dive back to the client software. You’re going to install a small piece of software called BSIM on your computer. This software has two components. The first is a desktop tray app that sits there and watches your online account for changes and synchronizes them to your locally installed desktop client. This includes your scheduled rides, history, etc…
Additionally, this software enables firmware updates to the BKOOL system.
Once you’re done setting it up online, you’ll want to be sure that you’re firmware is up to date. The trainer itself supports firmware updates, and you do so via a USB cable. Now the only complaint I have here is that the USB cable they give you is pretty short. In my case, the computer is near the front of the bike. So that means I needed an USB cable extender to make it all the way to the back of the bike. I suppose I could have just dragged things around – but having an extender cable is always handy.
You can see once I’ve connected the cable that the BSIM tray and update software will detect the connection to the trainer and illuminate the nifty icon in the graph:
You’ll also notice that the ANT+ USB stick is plugged in as well. This comes with the BKOOL platform, and enables wireless connectivity to the trainer. The USB cable to the trainer is only for firmware updates, whereas the USB ANT+ stick is used for continuous operation (in other words it always needs to be plugged in). You can watch the BSIM utility to see the state of workouts that need to be sent to the server. Typically this happens instantly, but if for some reason your internet is down, it’ll just queue up. Fear not, as long as you have some sessions sync’d to the trainer, you don’t need live internet connectivity for all tasks
With everything set, we’ll go ahead and open up the actual BKOOL application, which is where we can start our sessions from.
You’ll see it has three main areas. The first is single player, then multiplayer, and then configuration. We’ll tackle configuration first since the options are pretty limited. Remember that most of the options you actually configure online ahead of time.
What you see above is about all you get within the app itself (except the ability to toggle Google Earth on/off, which is not shown in the above screenshot). The only additional accessible option is to pair devices, which you can do via the ‘Indoor Pairing Devices’ screen, which takes you to the below:
A pretty straightforward pairing menu, with your common ANT+ sensor types. Note that it doesn’t pair to an ANT+ power meter, instead, it will only pair to the heart rate and speed/cadence sensor types. Also note that it’s only reading sensor data from those, and doesn’t transmit the data back out to ANT+ head units. Meaning, your Garmin or similar device won’t be able to pickup signals from the BKOOL. Personally, I’d love to see this – as it really makes for a much more flexible training platform because it allows end users to control their training data on the device of their choice.
Back to the main menu we’ll go.
From here, we dive into the Single Player options. This will now show sessions that are either ‘in queue’ for me to complete (ones I’ve added online), or, ones that I’ve marked as favorites. You can see some of the sessions in this flipbook style screen contain simple non-graphical workouts (like the one labeled Barcelona), some are Real Videos (like the one to the right), and some are more game-like – such as the Velodrome one.
